You can set up custom templates in Engage Settings to automatically generate usernames and email addresses for users synced through SnapSync integrations. This helps ensure consistency and can save time for administrators managing user imports from external systems.
Steps to Configure User Field Templates
- Go to Engage Settings
- Locate the Templates Section
Find the section for auto-generated user field templates.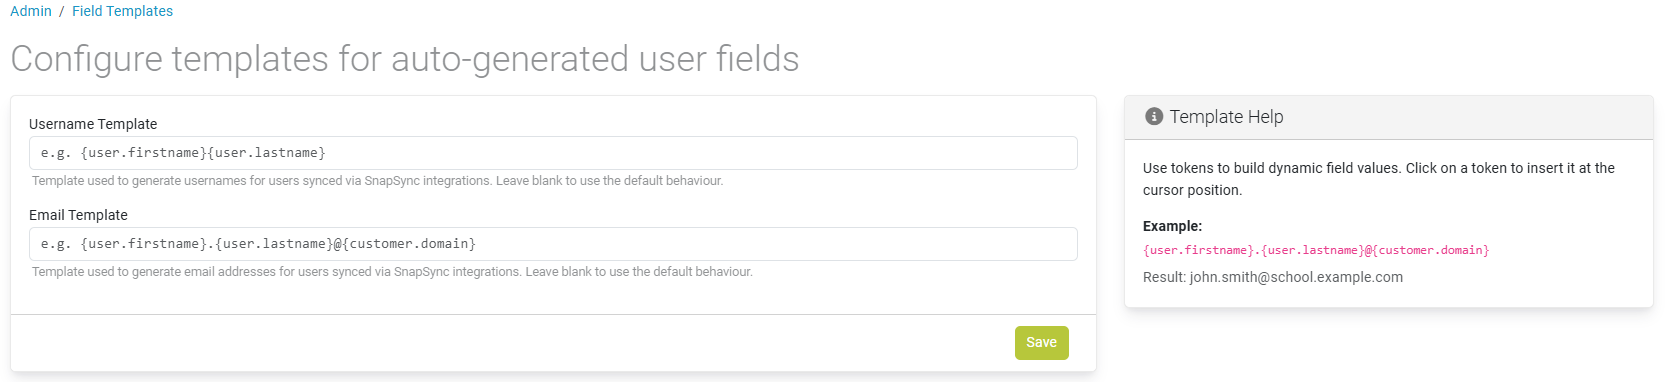
- Set a Username Template
Enter your desired format in the Username Template field.- Supported tokens:
{user.firstname}: The user's first name{user.lastname}: The user's last name{customer.domain}: Your institution or customer domain
- Example:
{user.firstname}{user.lastname}@{customer.domain}
Result: johnsmith@school.example.com
- Supported tokens:
- Set an Email Template
Enter your format in the Email Template field using the same tokens.- Example:
{user.firstname}.{user.lastname}@{customer.domain}
Result: john.smith@school.example.com
- Example:
- Save Changes
Save your settings to apply the template to future users created via SnapSync.
Tips
- Leave a template field blank to use the default system-generated value.
- Use the Insert Token action to easily add tokens to your template at the cursor position.
Supported Tokens Reference
| Token | Description | Example Value |
|---|---|---|
{user.firstname} | User's first name | john |
{user.lastname} | User's last name | smith |
{customer.domain} | Customer or school domain | school.example.com |
Example Configurations
| Template | Result |
|---|---|
{user.firstname}{user.lastname} | johnsmith |
{user.firstname}.{user.lastname}@{customer.domain} | john.smith@school.example.com |
{user.lastname}@{customer.domain} | smith@school.example.com |
Need help? Use the live chat in the bottom right corner of your screen, email us at help@snapplify.com or reach out via Whatsapp +27 60 011 8065.


